记录一下在CTFHUB上面刷题和学习过程。欢迎大家分享交流~
1 HTTP协议
这部分内容主要是学习发送基本HTTP协议数据包的方法,还可以学习一下curl命令的使用,参考这个链接。
1.1 请求方式
本题主要是考察用自定义的请求方法,发起请求。可以使用requests库或者用burpsuite构造请求发送都可以。
1 | import requests |
用curl命令来做
1 | curl -X CTFHUB http://challenge-6caccbf431e3c435.sandbox.ctfhub.com:10080/index.php |
1.2 302跳转
打开F12,可以看到有一个302跳转从index.php跳转到index.html。猜测可能答案与index.php有关。用curl命令看一下http response.
1 | curl -v http://challenge-b8a4ac0891aac6dd.sandbox.ctfhub.com:10080/index.php |
1.3 Cookie
只需要打开F12看一下,有一个set-Cookie admin=0,结合页面上的提示,我们把cookie修改成admin=1,重新发送就成功了。
1 | # -*- coding: utf-8 -*- |
当然也可以用curl命令来做
1 | curl -b 'admin=1' http://challenge-b16d8484fbfff410.sandbox.ctfhub.com:10080/ |
1.4 身份验证
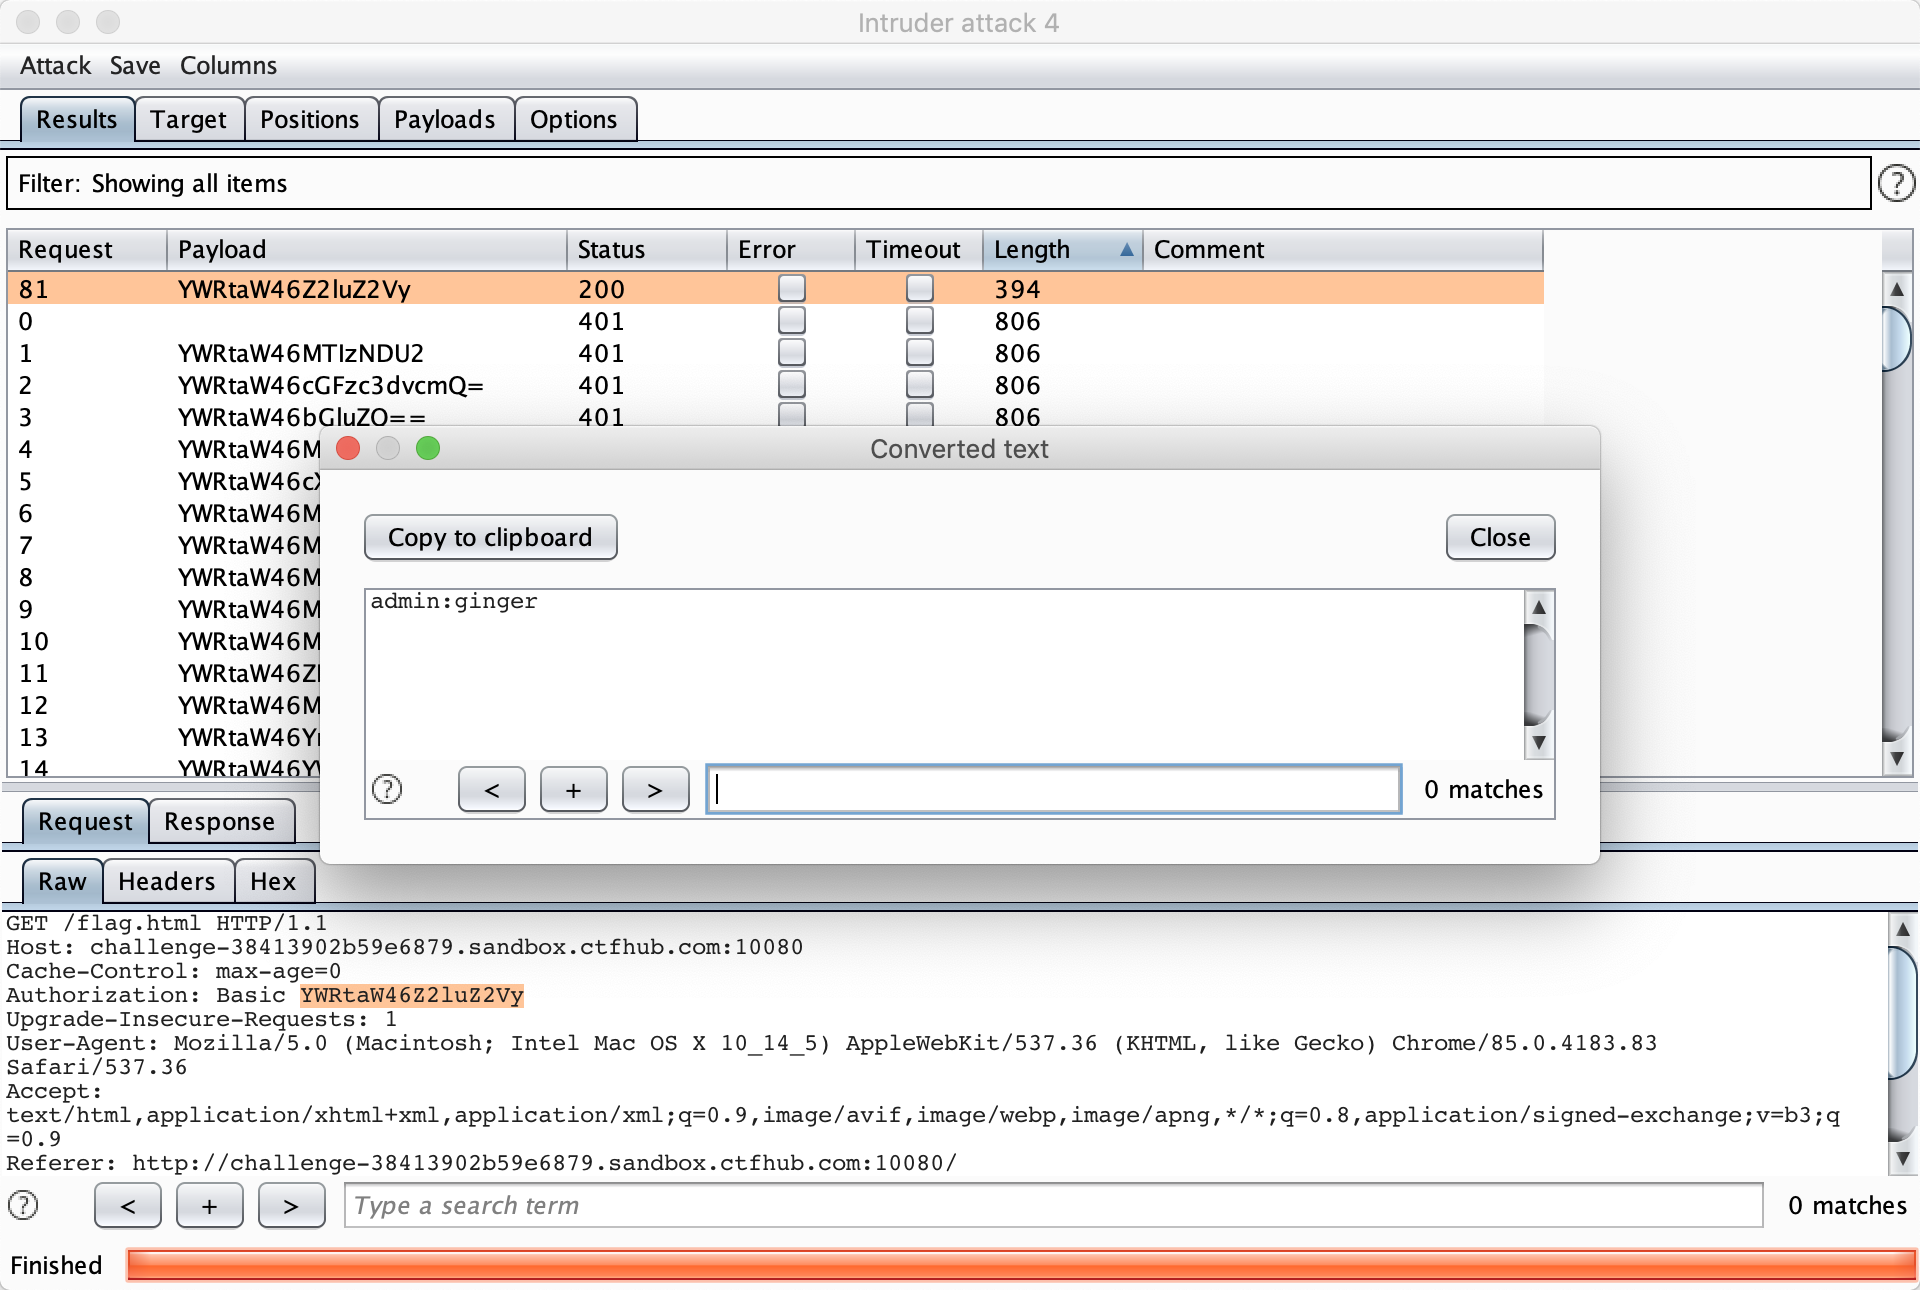
从题目中给的链接可以嘘唏到HTTP基本认证的相关知识,然后通过查看服务器发过来的response头,其中有很明显的提示用户名为admin,接下来就很简单了,下载题目附件,用burpsuite爆破。但是要注意把字典编码成base64的。
1 | # -*- coding: utf-8 -*- |
爆破结果如下:

2 密码口令
2.1 弱口令
这个就是一个基本的弱口令爆破,但是需要一点小技巧,用户名不要暴力尝试,那样成功率太低,默认为admin或者root,枚举一下密码就可以了。
Attack type 选择pitchfork
最后我拿到口令的用户名和密码是「user=admin」「password=admin123」
2.2 默认口令
这个居然真的直接搜一下默认口令就能找到23333
1 | eyouuser eyou_admin |
3 信息泄漏
3.1 目录遍历
这道题目直接提供了目录,我们只需要逐级遍历,找到flag所在的位置就可以,虽然目录很少,可以手动查找,但还是写了一个脚本扫描。
1 | # -*- coding: utf-8 -*- |
结果如下所示
1 | http://challenge-9fa7c1783d8e762f.sandbox.ctfhub.com:10080/flag_in_here/ |
可以很清晰的看到flag.txt的位置,去打开它就可以了~
3.2 phpinfo
直接访问这个phpinfo的界面,就可以看到flag。
4 备份文件下载
4.1 网站源码
题目中给了一些提示
1 | 常见的网站源码备份文件后缀 |
于是写了个程序暴力枚举了所有的情况,然后根据返回的数据的不同,判断源码可能在哪里。
1 | prefix = ['web','website','backup','back','www','wwwroot','temp'] |
4.2 bak文件
题目中说的很清楚flag在index.php文件中,我们只需要尝试访问index.php.bak就可以拿到flag了。
4.3 vim缓存
vim编辑器的意外退出文件格式一般为 $’.文件名.swp’$
所以只需要根据提示在网站上访问.index.php.swp,就可以下载到一个二进制文件,我们在本地打开这个二进制文件,就可以看到flag。
4.4 DS_Store
DS_Store是一种常见的macos缓存格式,里买呢会有一些mac文件目录的信息,所以我们尝试访问这个文件,然后同样得到一个二进制文件,里面可以看到一个txt的文件名。我这里是
1 | e59a5c7af1264ba2c5f4457e77cc09aa.txt |
访问这个文件就可以拿到flag了。
5 Git泄漏
5.1 Log泄漏
https://github.com/wangyihang/githacker
使用这个脚本拿到.git全部的文件并且恢复到当前的head,然后可以用git log –reflog命令查看git更新记录。可以很清晰的看到添加flag的步骤,然后硬重置到那一个版本就可以看到flag了。
5.2 Stash泄漏
1 | git stash list |
6 SVN 泄漏
7 HG泄漏
https://mercurial.selenic.com/wiki/fncacheRepoFormat#Hashing_of_long_paths
在这个页面下可以看到fncache file的描述,存储所有的filelog文件,因此通过这个文件可以看出这个网站都有哪些文件。
5. The fncache file
For the fncache repository format Mercurial maintains a new file
'fncache'(thus the name of the format) inside'.hg/store'. The fncache file contains the paths of all filelog files in the store as encoded bymercurial.filelog.encodedir. The paths are separated by'\n'(LF).The fncache file is used to enumerate all filelog files in the store, for example when doing a
clone --uncompressed. The fncache file may contain duplicates or inexistent entries (this can happen when using thestriporrollbackcommmands).During a
clone --uncompressedor ahg verifythe fncache file is read and rewritten if duplicates or entries with missing filelog files are detected, so even operations that don’t modify the history of the repository may lead to modifying the fncache file (this was a deliberate design decision as discussed with mpm).The fncache file is not read by a
hg clone --pull, so that command may be used to resurrect a damaged fncache file, sincehg clone --pullrewrites the fncache file from the information found in all manifest revisions. That’s also the reason why it is basically cached information.The
verifycommand checks the fncache file and removes non-existent or duplicate entries. If a filelog file referenced in a manifest revision is not found in the fncache file,hg verifyreports an error.
所以我们访问./hg/store/fncache 就可以看到一个filelist
1 | data/index.html.i |
因此我们我们猜测flag就在flag_2277621920.txt这个文件里,直接访问就可以拿到flag。
